


When my display (here you can see how I installed it) is dirty, it is very practical to have a “cleaning function” that deactivates all inputs for a short time so that nothing is modified while cleaning. Here I would like to show you how I implemented this.
Installing the web server
For this function, I use a web server that receives a request. This then executes a shell script that disables the input from the touch screen.
|
1 |
sudo apt install apache2 php |
PHP Script
Then I use a simple PHP script that starts a shell script as user “pi”:
|
1 2 |
<?php exec('sudo su -c "/home/pi/cleanmode.sh" pi'); |
I saved this in /var/www/html/cleanmode.sh.
Shell-Script
For the shell script, one must first find out the ID of the touch screen. With the following command, all IDs can be displayed:
|
1 2 3 4 5 6 7 8 9 |
pi@raspberrypi:~ $ DISPLAY=:0 xinput list ⎡ Virtual core pointer id=2 [master pointer (3)] ⎜ ↳ Virtual core XTEST pointer id=4 [slave pointer (2)] ⎜ ↳ ILITEK ILITEK-TP Mouse id=8 [slave pointer (2)] ⎜ ↳ ILITEK ILITEK-TP id=7 [slave pointer (2)] ⎜ ↳ vc4 id=6 [slave pointer (2)] ⎣ Virtual core keyboard id=3 [master keyboard (2)] ↳ Virtual core XTEST keyboard id=5 [slave keyboard (3)] ↳ vc4 id=9 [slave keyboard (3)] |
Then try all the IDs with
|
1 |
DISPLAY=:0 xinput disable [ID] |
until the touchscreen no longer works. In my case it was ID 7.
The following shell script must then be adapted:
|
1 2 3 |
DISPLAY=:0 xinput disable 7 sleep 60 DISPLAY=:0 xinput enable 7 |
The time in line 2 can also be adjusted as desired. My script is located in /home/pi/cleanmode.sh. If this is different for you, you must change the path in the PHP script accordingly.
Grant the user www-data root rights
In order for the user www-data (this is used by the web server) to be able to execute the shell script as user pi, he needs root rights.
WARNING: Giving the user www-data root rights is a major security risk. Under no circumstances should this be done on a web server accessible from the Internet!
We open the file /etc/sudoers with the command
|
1 |
sudo visudo |
and enter the following line under “User privilege specification”:
|
1 |
www-data ALL=NOPASSWD: ALL |
After saving with Ctrl+O, exiting with Ctrl+X and restarting, the user www-data now has root rights. Now open the following URL in the browser:
http://[IP_OF_YOUR_RPi]/cleanmode.sh
the touchscreen should switch off and then switch on again after 60 seconds.
Cleaning function in Homeassistant
Homeassistant is currently running on my display. I would like to have the cleaning function as a button there. I would also like a timer that shows me how much time I have left until the touchscreen is activated again.
I have stored the following configuration in config.yaml:
|
1 2 3 4 5 6 7 |
rest_command: cleanmode: url: "http://[IP_MEINES_RPi]/cleanmode.php" timer: putztimer: duration: "00:00:60" |
The first is the call to the URL, the second is the timer.
I then created a button in the Homeassistant UI under “Helper”.
An automation then controls the whole thing, so it starts the timer and then calls up the URL:
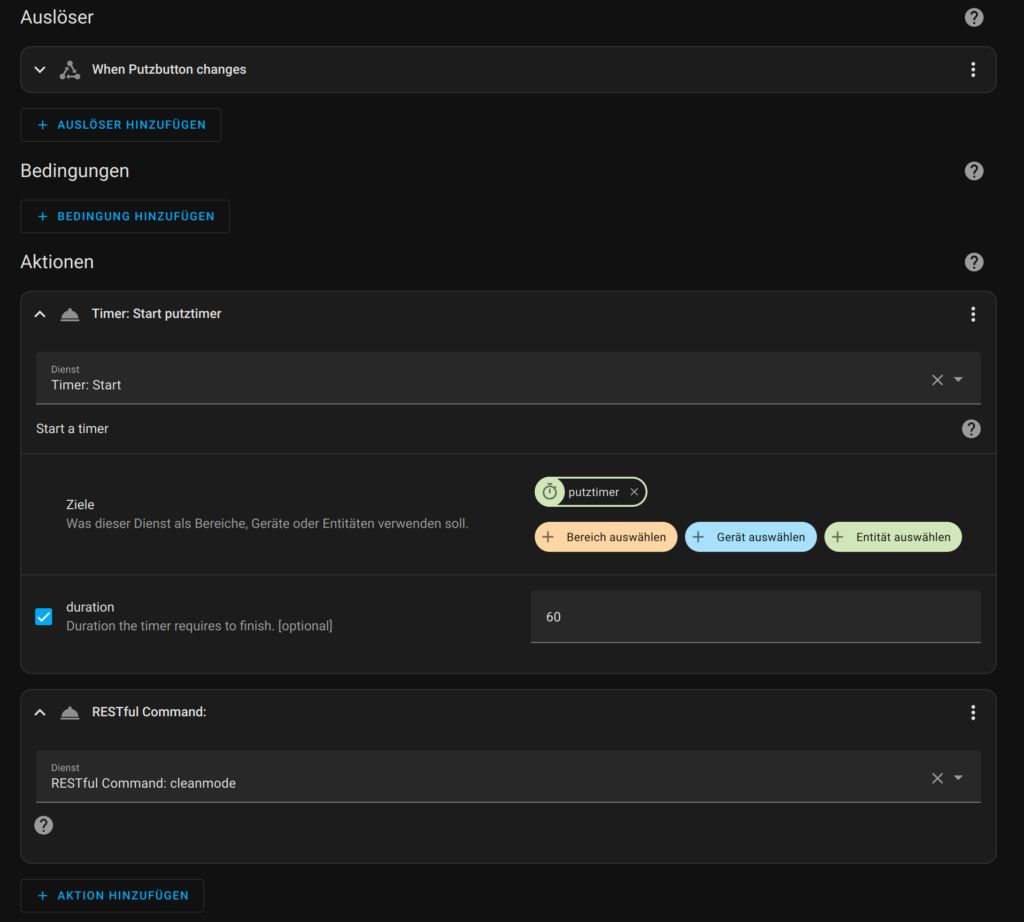
And here in text form:
|
1 2 3 4 5 6 7 8 9 10 11 12 13 14 15 16 |
alias: Putzbutton description: "" trigger: - platform: state entity_id: - input_button.putzbutton condition: [] action: - service: timer.start data: duration: "60" target: entity_id: timer.putztimer - service: rest_command.cleanmode data: {} mode: single |
Leave a Reply